How to Build a Brick BBQ
OK, so 2020 might not be panning out exactly as we planned and those trips to the beach might have to be put on hold, but that doesn’t mean the summer’s a write off! Everyone knows the best summer evenings are spent in your garden with a barbecue, anyway.
Oh, you don’t have a barbecue? B&Q’s still closed? That’s not a problem, because we’re going to be teaching you how to build your own, proper-fancy brick barbecue, so you can woo your friends (if they’re allowed over) and save you some money.
Before we start, here’s what you’ll need:
- Bricks (shocker!)
- Brick setts
- Paving slab
- A barbecue grill set
- Sand
- Cement
- Spirit level
- Shovel
- Trowel
- Length of hose pipe
Step 1 – sizing things up
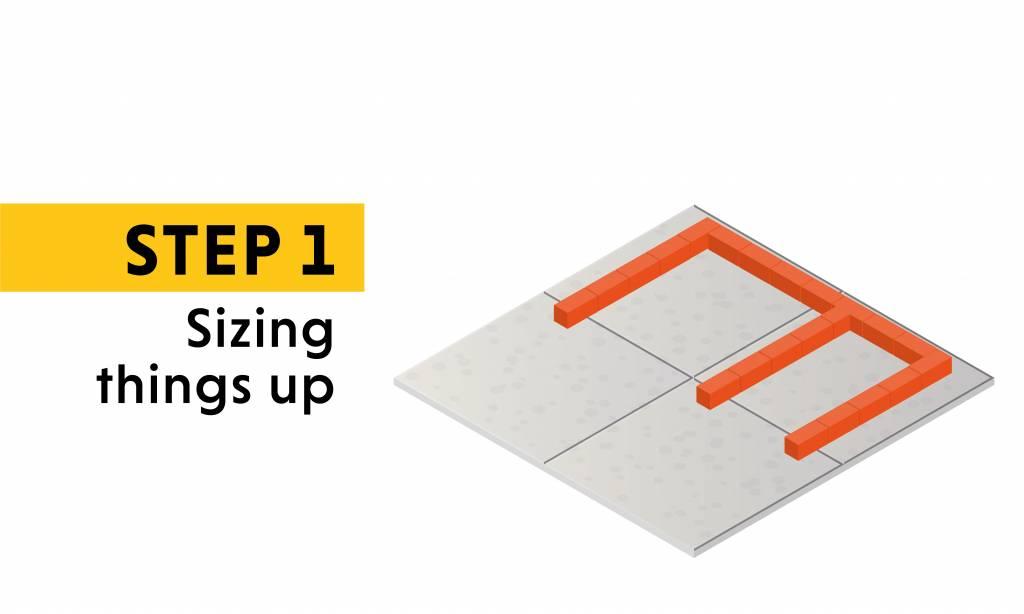
You can start by laying out the first course of bricks. To work out the shape of the barbecue itself, use the grill as a guide and build around that. If possible, use whole bricks, you’ll avoid a headache by not having to cut them.
At this time, it’s also worth thinking about how tall you want your barbecue, as this will impact how many courses of bricks you will require.
Step 2 – start the foundations
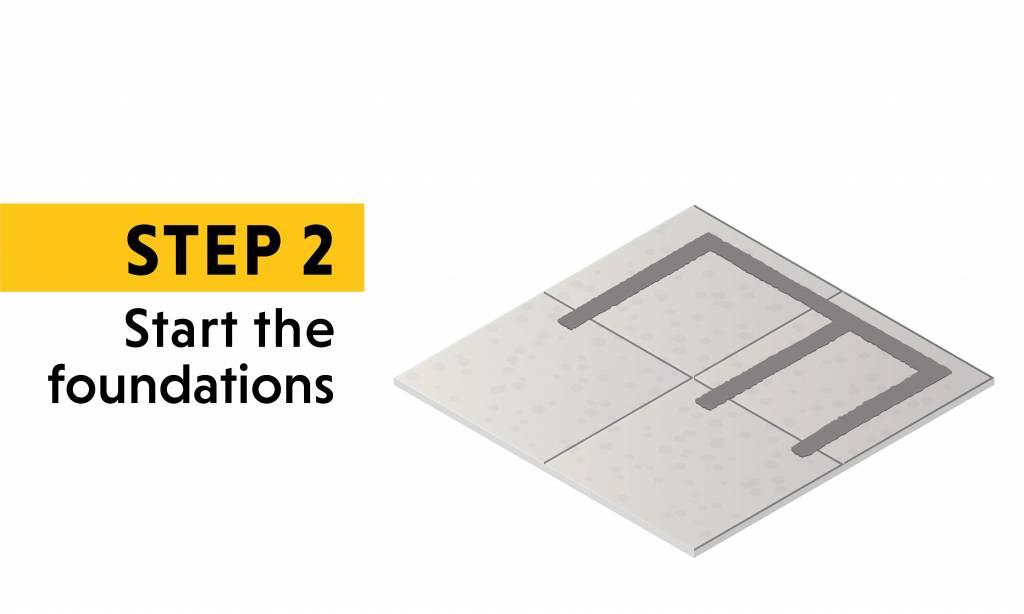
Mix together five parts sand to one part cement, adding water as you go until you get the right consistency. Before you start spreading the mortar where your first layer of bricks were, check the level of the site and compensate for any unevenness with your spreading.
Step 3 – lay the first course
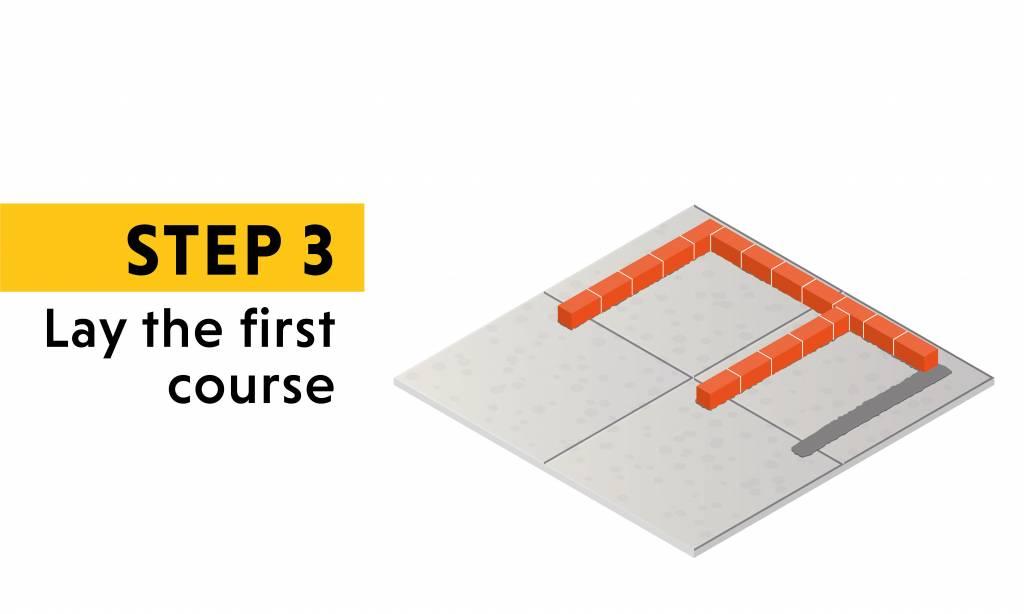
Start laying your first course of bricks back on the mortar, and mark out where the outer edge of the barbecue is in the cement. Make sure you check the level of your first course too, it’s worth heading off any problems with unevenness right at the start.
Step 4 – add some strength
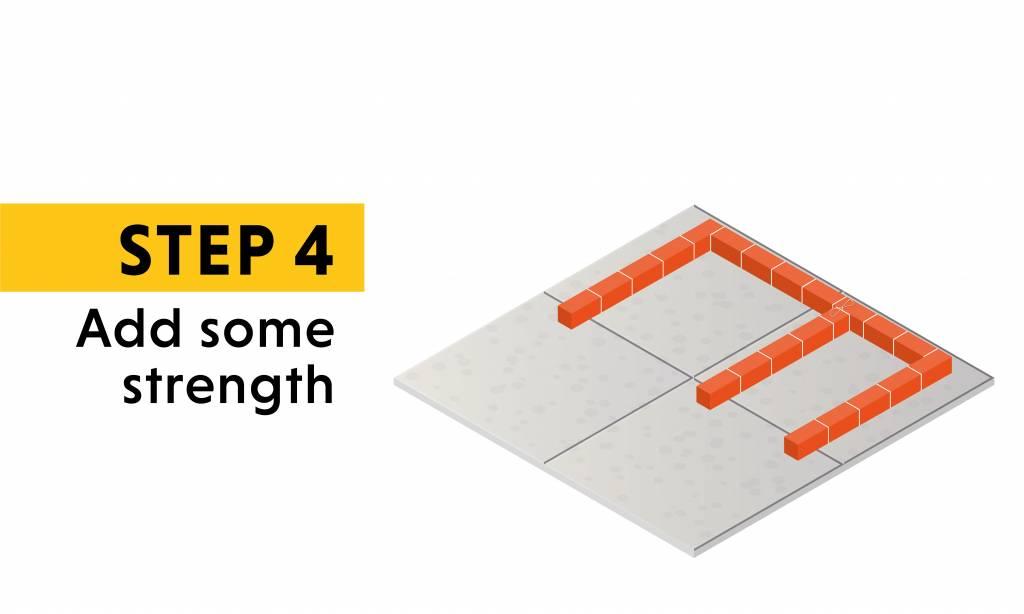
If you want to give the finished product some added security, insert a metal tie where the inner wall meets the external wall. This will ensure the barbecue strengthens as you add each course.
Step 5 – add some height
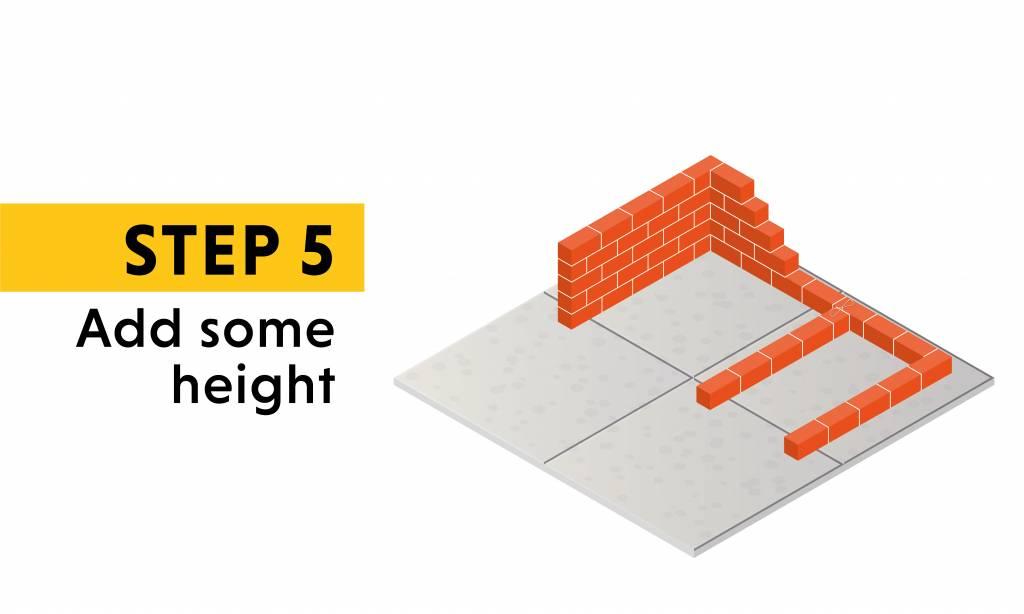
Now you can start laying the following courses of bricks – starting at the corners, of course. To ensure maximum strength, stagger the vertical joints alternately to the width of a half brick.
Step 6 – check the level
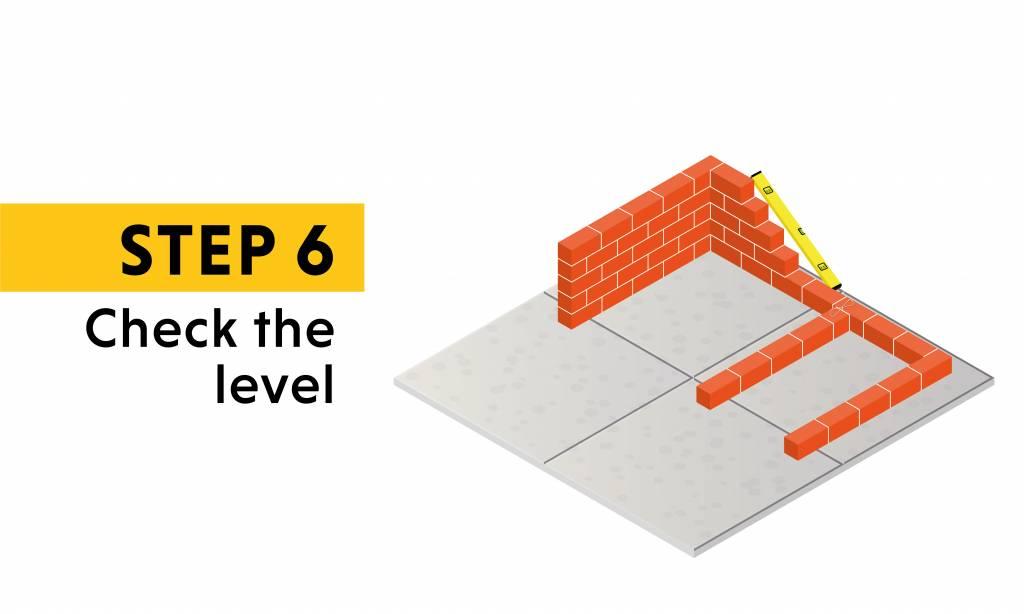
Once you have completed a couple of courses, use your spirit level to check that each corner of the barbecue is straight and even. This will ensure that the finished structure is a square.
Step 7 – build up some more
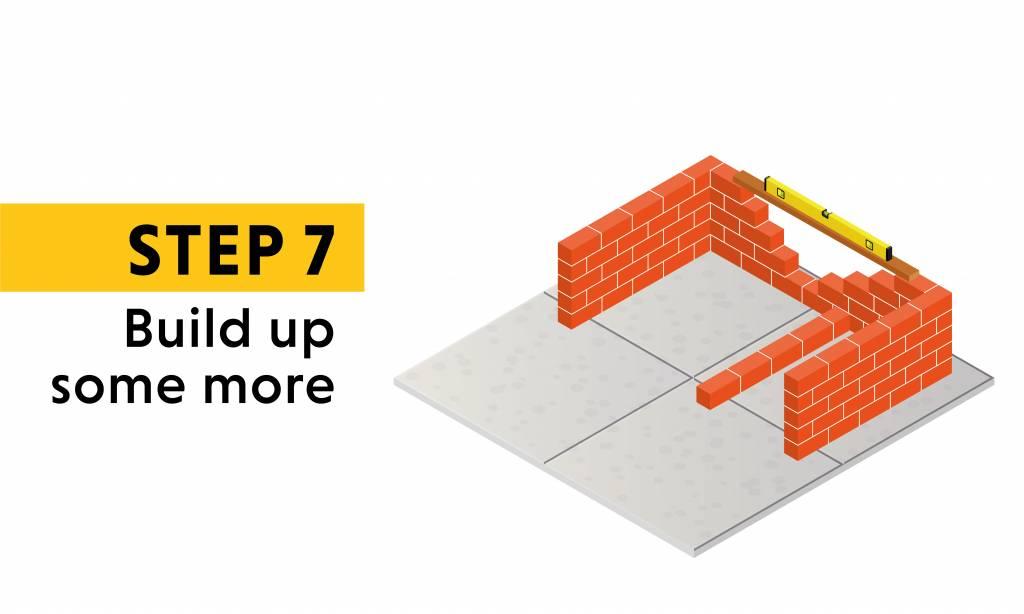
When you have reached up to five courses at each corner, take a piece of wood and balance it across the structure, then take your spirit level and make sure it’s even.
Step 8 – securing the trays
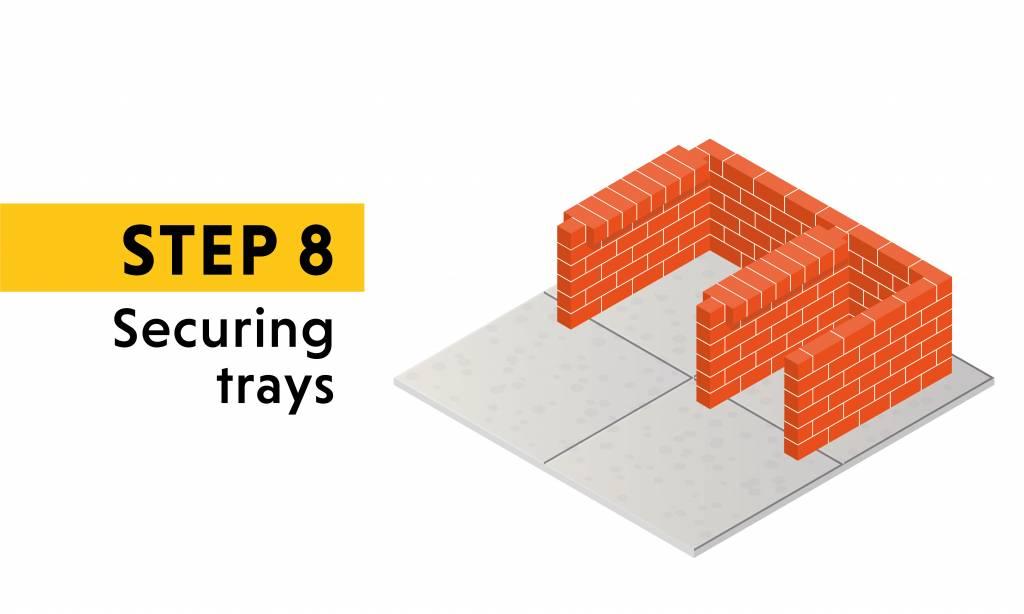
Now you can start building the whole structure up to seven or so courses and think about securing your charcoal tray. To do this, turn the bricks along the left-hand and inner wall sideways, allowing them to act as a secure ledge for the tray to sit on. To create a flush edge at the end of each wall, you will need to use half a brick.
From here, build up the walls another three courses and turn the left-hand and inner wall bricks sideways once more to secure the grill tray.
Step 9 – finishing touches

To get everything looking proper professional, use that length of hosepipe to draw along each of the joints. Once you’ve done that, lay your final course of brick setts and check the levels again.
Step 10 – Adding a workstation
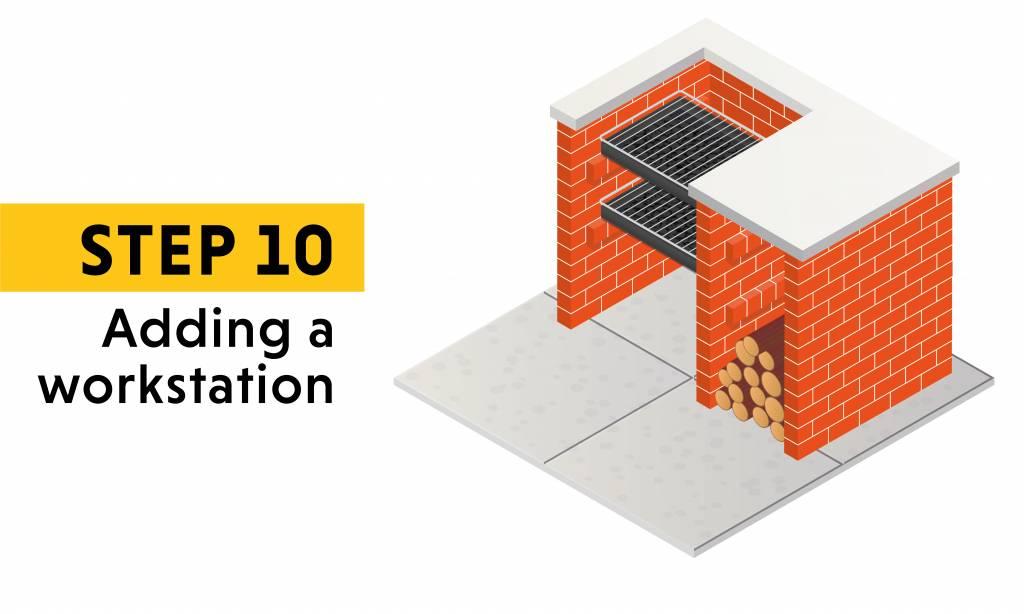
Remember that slab we asked you to get? You can lay that on the right side of your barbecue, next to the grill section, giving you a handy little workstation for when you’re cooking up a storm.
Need some tools to help build that barbecue? Need help calculating how many bricks you need? For expert advice and the very best DIY materials anywhere in London, look no further than Hitchcock & King. We have over 40 years of experience delivering quality construction materials to clients throughout the capital, meaning there’s simply no one better to meet your project needs than us. For more information, just give us a call.